


Before reading this content, it will be helpful to check the basic knowledge of DSG to deepen your understanding.
👉 DSG Transmission Basics
Quick cost estimate chart
| Repair details | Main work content | Estimated cost (tax included) | Estimated work time |
|---|---|---|---|
| Minor bleeding repair | Outer gasket and O-ring replacement/degreasing and cleaning | Approximately 20,000 to 40,000 yen | Approximately 2 to 3 hours |
| Mechatronics disassembly and repair | Internal gasket, coupler O-ring, and boot replacement | Approximately 60,000 to 100,000 yen | Half a day to a day |
| Housing crack repair (replacing parts) | Accumulator side housing replacement | Approximately 60,000 to 80,000 yen | Approximately 4 to 5 hours |
| Mechatronics unit replacement (used/rebuilt) | Complete mechatronics replacement + initialization and learning | Approximately 150,000 to 250,000 yen | 1-2 days |
| Mechatronics unit replacement (new) | New unit replacement + PCB transplantation and reprogramming | Approximately 250,000 to 400,000 yen | 1-2 days |
Volkswagen’s 7-speed dry DSG (model: DQ200) is a popular transmission that combines light driving performance with good fuel economy.
They are widely used in everything from compact cars to minivans, and many people say they like the smooth, satisfying acceleration.
However, many people also notice symptoms like faint oil stains in parking lots or the underside of their car looking a little damp.
In fact, it’s possible that oil is leaking from the mechatronics unit (the part that controls gear shifting) .
Even if the amount is very small at first, over time the oil pressure will decrease, causing problems such as gear shift shocks and gears slipping out .
If it progresses further, it may affect the internal electrical system and cause the car to stop shifting completely, so caution is required.
In this article,
we will explain as clearly as possible why oil leakage occurs, what kind of repairs are needed, and how to prevent it, using an actual example of oil leakage that occurred in a 7-speed dry DSG.
If you know the details, the mechanic’s explanation will be much easier to understand.
If you find oil stains, don’t panic.
Read this article to find out which part is the problem and what to do about it.
The first step to protecting your car’s health is to notice them.
Reference video: Nile Mecha Channel “Mechatronics Oil Leak Repair”
Reference material: VW Touran DSG Mechatronics Repair! Oil Leak Gasket Replacement Report
▼Nile Mecha Channel Technical Article Navigation▼
DSG Special Feature
Suspension Special Feature
Engine Special Feature
👉Check out:Nile Mecha Channel (youtube)
Related articles:DSG/Transmission
- Explained: The 6-Speed Wet DSG (DQ250)
- Won’t Move in D Range: Causes of 7-Speed Dry DSG (DQ200) Failure and What to Do
- Does the 7-Speed Dry DSG (DQ200) Need an Oil Change? Costs, Procedure, and Facts
- DQ200 Dry DSG Clutch Guide: Design, Replacement Cost, Judder Symptoms, and Longevity Tips
- Is DSG Judder in the 7-Speed Dry DSG (DQ200) Really Just a Clutch Problem?
- A Complete Guide to the 7-Speed Dry DSG Mechatronics
- Inside the Shop: Rebuilding DSG Mechatronics
- DQ381 Wet DSG Oil Change Guide: When to Service, Cost, Time, and Filter Replacement
- DSG Mechatronics Oil Leak: Causes, Repair Costs, and O-Ring & Gasket Replacement Tips
- What is the oil leak in the mechatronics part of the 7-speed dry DSG (DQ200)?
- DSG Mechatronic oil leak locations and gasket/O-ring replacement parts list
- Work summary: Mechatronics disassembly and gasket replacement
- Generation differences: Golf 6th and 7th series and later
- Check points after oil leak repair
- The answer to oil leaks is to repair them early! What happens if you leave it?
- DQ200 Mechatronics Oil Leak Repair Cost and Work Time Estimate
- Frequently Asked Questions (FAQ)
- We also recommend these articles:
- Details of defects by vehicle type


What is the oil leak in the mechatronics part of the 7-speed dry DSG (DQ200)?
Volkswagen’s 7-speed dry DSG (model: DQ200) uses a structure called a “dry clutch.”
This “dry” means that the clutch disc is not immersed in oil.
The part that transmits engine power to the gears is in the air, and since there is no oil resistance, it is lighter and operates more efficiently.
Meanwhile, the “mechatronics unit (hydraulic control device)” that controls gear shifting contains solenoid valves and hydraulic pumps, and special hydraulic oil circulates to operate these.
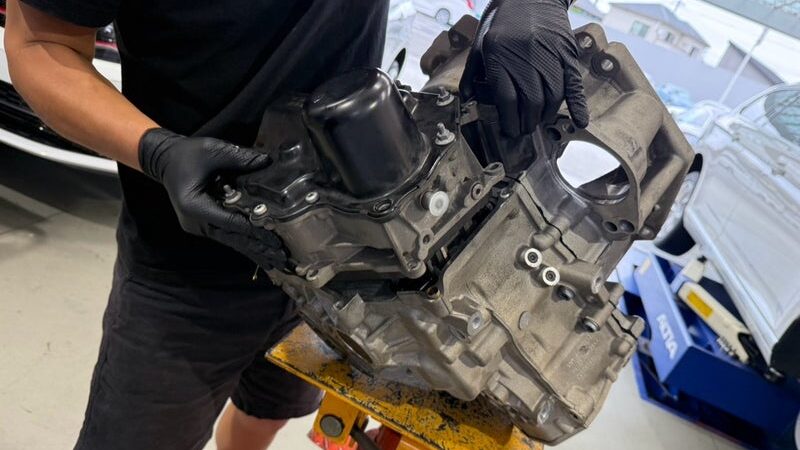
In other words, even though it is called “dry type,” it does not mean that no oil is used at all; only the control parts are hydraulic .
To keep this hydraulic pressure contained, multiple gaskets and O-rings are attached to the joints inside and outside the mechatronics .
However, because these are made of rubber or resin, they can harden over time or shrink slightly due to heat, weakening their sealing ability .
When this happens, oil will “ooze” out onto the outer periphery of the mechatronics.
In the early stages, it won’t be noticeable, and will just look like a dark, wet spot due to the accumulation of sand and dust, but if left unattended, the internal pressure will gradually decrease, disrupting hydraulic control and causing delays in gear shift timing.
If the problem progresses further, the gears may slip out or the shift shock may become stronger.
At this point, it is no longer just a case of “simple bleeding.”
Highly precise hydraulic control is crucial for DSG. That’s why it’s important to take action as soon as you notice
even the smallest oil leak . Don’t be complacent and think, “It’s okay because there’s no oil dripping,” but inspecting and repairing at the leaking stage is the best way to prevent problems before they occur.
DSG Mechatronic oil leak locations and gasket/O-ring replacement parts list
| position | Part Name | Symptoms | countermeasure |
|---|---|---|---|
| Mechatronics periphery | Oil pan gasket | Smearing + dust adhesion | Degrease → Replace with new one |
| Mechatronics board joint | Gasket (flat packing) | Smearing and dampness | Replace with new ones/tighten evenly to 7N·m |
| Coupler part | O-ring | Oozing from the base of the coupler | New O-ring installed + lubrication applied |
| Clutch piston | Boots + 2 O-rings | Torn boots and hydraulic oil leaks | Simultaneous replacement is recommended |
| Accumulator side | Housing crack (subject to recall) | Pressure loss/oil leak | If the housing has been replaced with a countermeasure product, it is OK. |
You can scroll
Even though the oil is leaking from the mechatronics unit, it is not leaking from just one place.
The DQ200 has multiple gaskets and O-rings stacked on top of each other from the outside to the inside, and the symptoms and repair procedures will vary slightly depending on which part is leaking.
Oozing from the oil pan gasket on the outer periphery of the mechatronics
For example, the most common problem is seepage from the oil pan gasket on the outer periphery of the mechatronics
. This area is susceptible to vibrations and heat while driving, so as the rubber gasket hardens, a slight dampness appears on the mating surface.
Even if it looks like a small leak, if it has become blackened with dust, it is time to replace the gasket. The key
to resolving this problem is to thoroughly degrease the surface, replace it with a new gasket , and tighten it evenly.
Oozing from the joint between the mechatronics board (control unit) and the main body
The next most common problem is the joint between the mechatronics board (control unit) and the main body .
A thin, flat gasket is sandwiched here, and if its adhesion weakens over time, oil will gradually seep out.
The basic rule is to tighten the mounting bolts evenly to approximately 7 N·m; applying too much force can actually cause distortion, so torque management is important.
Oozing from the coupler
Another thing that is easy to overlook is the small O-ring used in the coupler (electrical connector) .
If oil leaks from this part, it can easily accumulate at the base of the coupler, and if left unattended, it can contaminate the electrical contacts and cause communication errors.
Here too, replacing the O-ring with a new one and lubricating it with a small amount of grease before installing it will help prevent recurrence.
Oozing from the clutch piston or accumulator
Also, be careful of cracks in the clutch piston or accumulator housing
. If the boots or O-rings on the clutch side are torn, hydraulic oil may leak out, so it is best to replace the boots and O-rings as a set.
A recall has been implemented for the accumulator side in some vehicle models, so if you have already replaced the housing with a corrective product, there is no need to worry.
There are multiple sources of oil leaks, but
by accurately diagnosing the problem and replacing each part appropriately, you can keep your DSG running smoothly for a long time.
👉 Summary of drive and transmission problems | Repair costs and solutions for DSG, clutch, etc.
Click below to jump to articles about engine, drive, exhaust, and cooling system problems and repair costs.
You can scroll
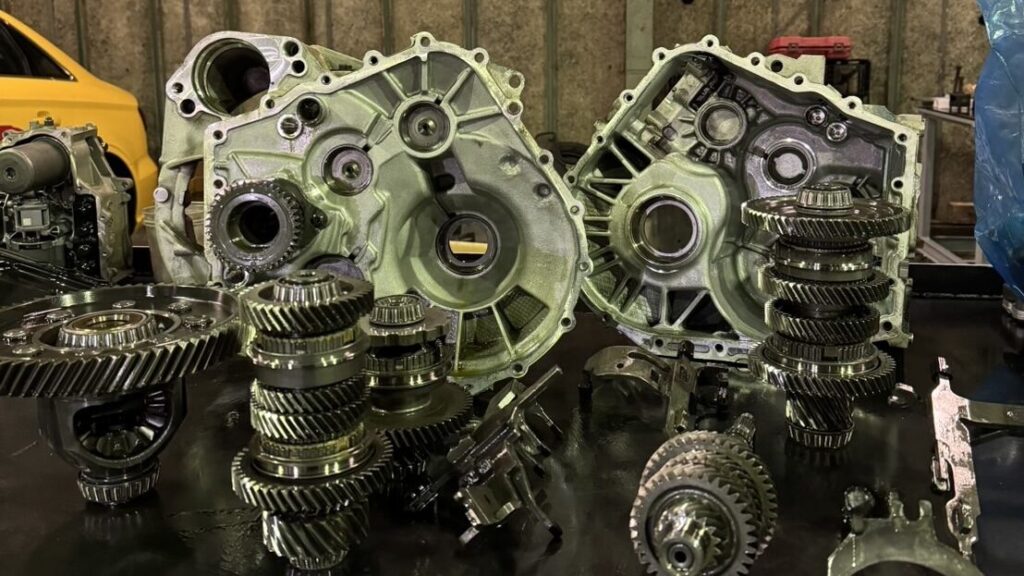
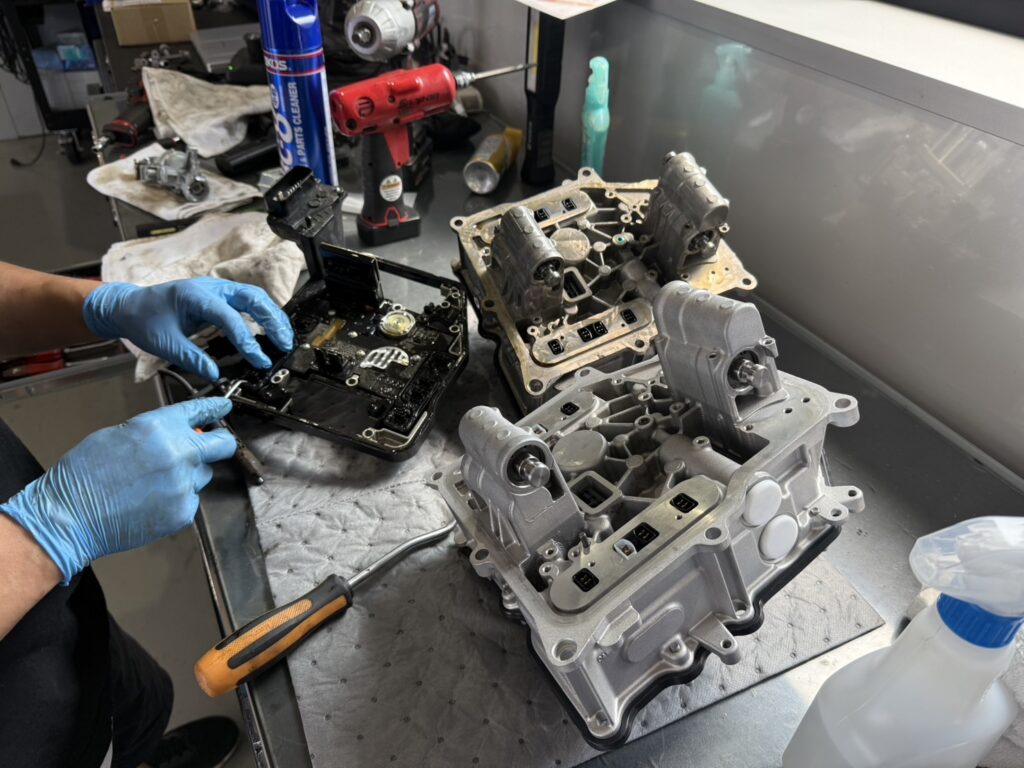
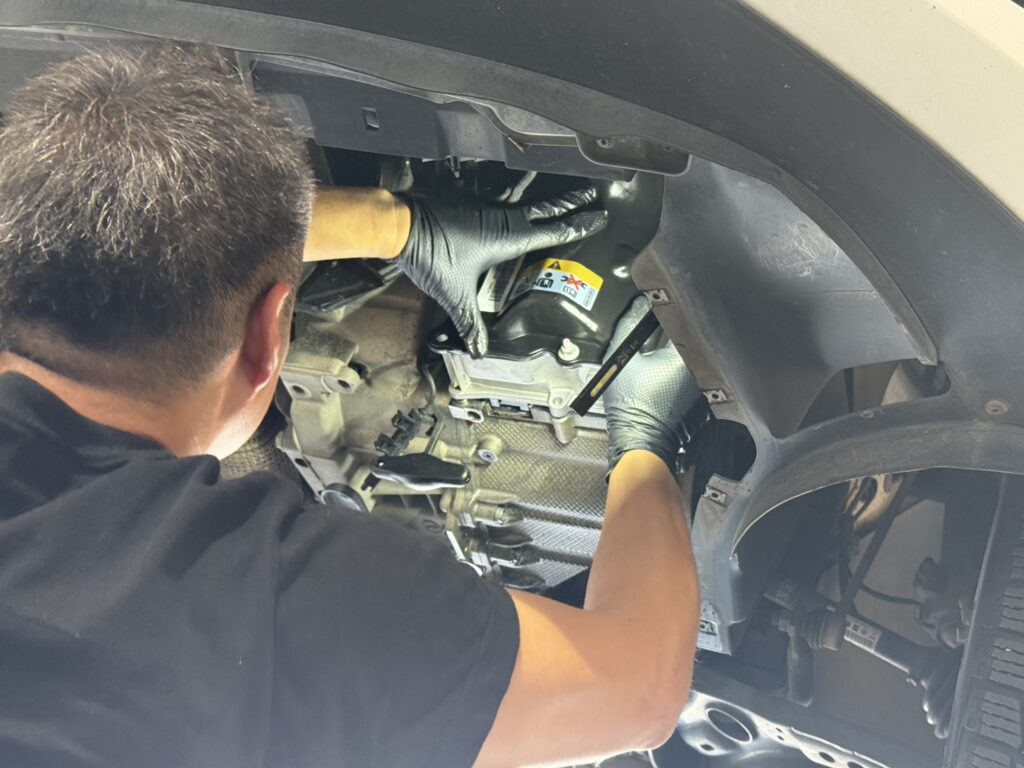
Work summary: Mechatronics disassembly and gasket replacement
- Remove the mechatronics board (ECU)
→ Torque: approx. 10 N·m, 7 bolts - Internal gasket and coupler O-ring replacement
- Remove oil pan
→ Check accumulator, pump, solenoid and piston inside - Replace the O-ring and boot on the clutch piston
. Remove the C-ring and replace both. - Degreased and cleaned, new gasket installed (using nonwoven fabric)
- Diagonal tightening to 10N·m torque control
- Refill hydraulic oil → Tighten drain → Check for leaks
Repairing oil leaks in a mechatronics unit is not just about replacing the gasket.
The inside is a complex network of hydraulic circuits and solenoid valves, and failure to follow the disassembly procedure and tightening torque correctly can result in recurrence of leaks or malfunctions.
Here is a general workflow.
Remove the mechatronics board (ECU)
First, before removing the unit from the vehicle, carefully remove the surrounding harnesses and hoses to make space,
then remove the mechatronics board (control computer) .
There are seven fixing bolts, each with a torque of approximately 10 N·m. Tightening them too much can distort the aluminum housing, so it’s important to tighten them evenly when removing and tightening them.
Internal gasket and coupler O-ring replacement
Next, replace the internal gaskets and coupler O-rings with new ones
. At this time, it is important to completely remove any debris or oil stains from the old gaskets.
If any dirt remains, even if you put on a new gasket, it will not seal properly and may cause leakage to occur again.
Oil pan removal and installation, clutch piston O-ring and boot replacement
Next, remove the oil pan and inspect the inside.
Inside, you’ll find the oil pressure accumulator, pump, solenoid, clutch piston, etc., and check that the O-rings and seals on each are in good condition. Ideally,
remove the C-ring on the clutch piston and replace the boot and two O-rings at the same time .
Degreased and cleaned, new gasket installed (using nonwoven fabric)
After the replacement work is complete, degrease and clean all joint surfaces and install new nonwoven gaskets .
Then, tighten the bolts diagonally, using a torque wrench to maintain a torque of 10 N·m.
Even the slightest unevenness in tightening will prevent the hydraulic line from remaining airtight.
Refill hydraulic oil → Tighten drain → Check for leaks
Finally, refill the hydraulic oil, tighten the drain bolt, and then check for leaks .
Let the engine idle for a while to raise the oil temperature and check for any leaks.
This work requires high precision in handling parts and torque control,
which is why degreasing, cleaning, and even tightening are the three keys to success.
The work requires high internal precision, so torque and cleaning of the sealing surface are the most important points.
Even repair shops that usually focus on Japanese cars will be able to accept more European cars if they understand the procedures and precautions for servicing
them. If you’re preparing your shop to handle imported cars, check out Yolost, which offers a wide range of maintenance supplies and work environment items
. They stock items that are useful for any manufacturer’s vehicle, including wiring, batteries, and engine oil.
Many of their products are easy to use even for beginners, making them a great first step in DIY maintenance .
- DSG oil change | An easy-to-understand explanation of change timing and effects
- Cost and effectiveness of 7-speed wet DSG oil change
- Does a 7-speed dry DSG require no oil changes?
- Explaining the necessity of changing the oil in a 6-speed wet DSG while working
Generation differences: Golf 6th and 7th series and later
| generation | Features | Points to note |
|---|---|---|
| Golf 6 / Early Touran | No immobilizer on the mechatronics board | Circuit board can be replaced/Easy to reuse second-hand parts |
| Golf 7 and later | Immobilizer mounted on mechatronic board | Requires board transplant or reprogramming upon replacement |
You can scroll
Even though they are both 7-speed dry DSG (DQ200), there are slight differences in the internal structure and control method depending on the generation.
In particular, the mechanism of the mechatronics unit (hydraulic control unit + circuit board integrated structure) has changed between the 6th generation and 7th generation Golf, so care must be taken when repairing or replacing it.
Golf 6 / Early Touran and earlier models
First of all, the Golf 6th generation (and early Touran models, etc.) do not have an immobilizer function (anti-theft device) on the mechatronics control board.
Therefore, if the control board breaks down, it can be replaced with a new or used board, making the replacement relatively simple. It was
also practical to reuse used mechatronics or use parts from other models.
Golf 7 and later models
On the other hand, for Golf 7 and later models , the immobilizer information is stored on the mechatronics board.
This means that simply replacing the mechatronics board will not work for this generation or later models; the board must be transplanted or reprogrammed (coded).
This process is performed using a dedicated diagnostic machine (such as VCDS or VAS), so it may not be possible at a general repair shop.
Additionally, the hardware itself has been finely improved with each generation.
The materials of the accumulator and housing, the shape of the gasket, and the structure of the coupler have all been improved, and the problems of oil seepage and internal pressure loss that were common in early models have gradually decreased.
However, for cars that have been in use for many years or have a lot of mileage, seals are prone to deterioration due to heat and vibration, so regular inspections and maintenance are essential.
In summary, the impression is that the Golf 6 generation is “easy to replace, but the rate of trouble is somewhat high,”
while the Golf 7 and later models have “improved structure and increased reliability, but there are more electronic restrictions when replacing.”
Regardless of the generation, the DSG is a precise hydraulic device.
Knowing the characteristics of each generation will help you make decisions and plan repairs smoothly in the event of a problem.
Even with the same DQ200, care must be taken as the control board specifications are different.

Check points after oil leak repair
Even after replacing the mechatronic gaskets and O-rings, it cannot be said that “the work is finished = relief.”
Because the DSG is based on precise hydraulic control, the post-repair inspection process is extremely important.
Here we will introduce four checkpoints that you should always perform after repairs.
① Check for leaks by observing for at least 30 minutes.
First, fill the hydraulic oil, then start the engine to ensure the oil is circulating properly
. As the oil temperature rises, the gasket expands due to the heat, allowing you to check the actual sealing condition.
Leave it for 30 minutes to an hour, and visually check for any “oozing” at the joints or the base of the coupler.
Even if the oil is dry immediately after the repair, slight leakage may occur due to temperature changes, so this step cannot be skipped.
② Recheck the oil level and temperature
DSG hydraulic oil volume changes with temperature , so level adjustment is critical.
When you open the drain bolt, the correct amount of oil is when a small, string-like flow of oil is detected.
When the oil is cold, it may appear to be too much or too little, so always measure within the specified temperature range (around 35-45°C).
If the oil level is insufficient, the oil pressure will be unstable, making it more likely that you will experience shocks when shifting gears.
3) Check the sensor values with a diagnostic tool
Even if there are no apparent problems, discrepancies in the oil pressure or temperature sensor values can cause abnormalities to be detected.
Use a diagnostic tool such as VCDS to check the real-time values of oil pressure, oil temperature, and clutch operating pressure
. Check whether any error codes (faults) remain.
This will allow you to determine whether the internal hydraulic circuits are functioning normally.
④ Check the gear shift feeling during a test drive
The last step is a driving test.
Repeatedly accelerate and decelerate in D range to check for any shift shocks or slippage
. If there is any jerking immediately after starting or a time lag when switching from 2nd to 3rd gear, this may be improved by performing a hydraulic re-learning (adaptation).
By carefully checking these points, the accuracy and reliability of the work will be significantly improved. The DSG is a delicate unit
that cannot be repaired and then finished; fine adjustments after repair will determine the final result .
The answer to oil leaks is to repair them early! What happens if you leave it?
Oil seepage from the mechatronics unit is a symptom that at first glance may not seem like a big deal.
There’s no oil dripping down the parking lot, and if you look underneath, it’s just slightly damp.
Many owners just keep driving it like that.
However, the inside of the DSG operates with a precise hydraulic balance,
and this hydraulic pressure is maintained by O-rings and gaskets that are only a few millimeters thick.
When this small part deteriorates and loses its sealing ability, even a slight leak can cause a drop in oil pressure, which
can eventually lead to symptoms such as gear shift shock and gear slippage.
If it’s just an oil leak, the repair can be completed by replacing the gaskets and O-rings and degreasing and cleaning
. The work takes a relatively short time and is not very expensive.
However, if the leak is left unattended, the oil pressure will drop and damage will occur to the control unit (the mechatronics unit itself),
which may require the unit to be replaced, resulting in repair costs in the hundreds of thousands of yen.
That’s why, if you are told during an inspection or vehicle inspection that “the bottom of the mechatronics is a little damp,” the best preventative measure
is to get a quote right away and take action as soon as possible .
If you take action at the bleeding stage, you can keep the DSG running smoothly for a long time.
The DQ200’s mechatronics can be described as a “precision hydraulic system that connects the brain and heart of the car.”
To protect this delicate mechanism, it is important to notice any leaks before they occur .
Don’t overlook even the slightest trace of oil and inspect it promptly.
This is the most reliable maintenance to keep your Volkswagen running well for a long time.
DQ200 Mechatronics Oil Leak Repair Cost and Work Time Estimate
| Repair details | Main work content | Estimated cost (tax included) | Estimated work time |
|---|---|---|---|
| Minor bleeding repair | Outer gasket and O-ring replacement/degreasing and cleaning | Approximately 20,000 to 40,000 yen | Approximately 2 to 3 hours |
| Mechatronics disassembly and repair | Internal gasket, coupler O-ring, and boot replacement | Approximately 60,000 to 100,000 yen | Half a day to a day |
| Housing crack repair (replacing parts) | Accumulator side housing replacement | Approximately 60,000 to 80,000 yen | Approximately 4 to 5 hours |
| Mechatronics unit replacement (used/rebuilt) | Complete mechatronics replacement + initialization and learning | Approximately 150,000 to 250,000 yen | 1-2 days |
| Mechatronics unit replacement (new) | New unit replacement + PCB transplantation and reprogramming | Approximately 250,000 to 400,000 yen | 1-2 days |
You can scroll
You can jump to an article that explains the costs and effects of each.
You can scroll
The cost of repairing an oil leak in a mechatronics system varies greatly depending on where the leak is and how much disassembly is required.
Here, we will use the 7-speed dry DSG (DQ200) found in typical Volkswagen vehicles (Golf, Touran, Polo, etc.) as an example to give you an idea of the approximate cost.
Partial repair (gasket and O-ring replacement only)
If the leak is minor and only requires replacing the gasket on the outer periphery of the mechatronics or the O-ring in the coupler, the estimated
cost, including labor, is around 20,000 to 40,000 yen.
The work takes about 2 to 3 hours, and in most cases, the vehicle can be left in for a day to be completed.
The gaskets and O-rings themselves are inexpensive, costing from a few hundred to a few thousand yen, but the labor required for removal, installation, cleaning, and torque control means that the main cost is the technical fee.
Internal repair (mechatronics disassembly and seal replacement)
If the mechatronics board needs to be removed or the O-ring and boot on the clutch piston needs to be replaced, the general price is
around 60,000 to 100,000 yen
. The amount of work required to disassemble the parts is large, and cleaning and checking the internal airtightness takes time, so the labor required increases dramatically.
However, maintenance to this level should eliminate most leaks and minor leaks.
Mechatronics unit replacement (if not reusable)
If a crack in the mechatronics housing or damage to the electronic board is found and the entire unit needs to be replaced, a
new one will cost around 250,000 to 400,000 yen, and a used, rebuilt one will cost around 150,000 to 250,000 yen.
For Golf 7 and later models, it may be necessary to transplant the circuit board including the immobilizer function and reprogram it, which
may cost an additional 20,000 to 30,000 yen.
👉 Summary of maintenance and customization costs and work days at VW specialty store Nile PlusMechatronics Replacement
Tips for keeping costs down
If the leak is minor, replacing the gasket early is the most cost-effective solution.
To prevent recurrence, it is a good idea to also replace the surrounding O-rings and boots at the same time.
Also, checking whether recalled parts (such as accumulators) have already been replaced with corrective parts
can help prevent unnecessary expenses.
The difference between being able to stop it with a “little leak” or going as far as “replacing the unit” depends on the timing of the inspection .
If you find oil stains, “consulting early” will save you money.
Disclaimer:
This article explains the general structure of a 7-speed dry DSG (DQ200).
Actual repairs require specialized tools and measuring equipment, and are dangerous if attempted by yourself.
If you suspect an oil leak, be sure to consult a VW specialist or import car repair shop.[DSG] A VW specialist will explain and repair an oil leak in a dry 7-speed DSG mechatronic unit!
Reference video: Nile Mecha Channel “Mechatronics Oil Leak Repair”
Reference material: VW Touran DSG Mechatronics Repair! Oil Leak Gasket Replacement Report
Frequently Asked Questions (FAQ)
Q1. Is it okay to leave a little bit of bleeding alone?
A. We recommend having it inspected as soon as possible. Even if the oil is not dripping, the sealing ability of the gaskets and O-rings has deteriorated
as soon as it is leaking . Over time, the oil pressure will decrease, which can lead to symptoms such as gear shift shock and gear slippage. Repairing it while the car is still drivable will keep costs down and prevent damage to the DSG itself.
Q2. Is it okay to get repairs done somewhere other than the dealer?
A. Yes, there is no problem with independent repair shops that are knowledgeable about VWs.
However, it is important that they are able to handle diagnostic equipment such as DSG-specific oil and VCDS
. Specialized equipment and experience are essential to accurately perform hydraulic control and initialization work. It
is safest to choose a VW specialty shop or import car repair shop with a strong track record.
Q3. Will changing the oil fix the leak?
A. An oil change itself will not “stop” the leak. This is because
an oil change is a maintenance measure to keep the interior clean, and does not fix the deterioration of the gaskets and O-rings
that cause the leak . However, if you have the undercarriage inspected when you change the oil, it will be a good chance to detect the leak early.
Q4. Is re-learning required after replacing the mechatronics?
A. Yes. If the mechatronics are replaced, the hydraulics and clutch operation will be re-learned (adapted).
This is a process to optimize the control according to the clutch wear and individual differences of each vehicle’s gears.
If re-learning is not performed, gear shift shock and slippage may remain. This
is usually done automatically using a diagnostic machine, so be sure to have it done when you have your car serviced.
Q5. Is there a warranty after oil leak repair?
A. It depends on the factory, but most offer a 3-6 month maintenance warranty
. To receive the warranty, you may be required to use genuine or manufacturer-specified parts. It’s
a good idea to check the warranty details before having work done.
The causes of leaking and the repair procedures vary from car to car, but one
thing they all have in common is that early detection and proper repair are key .
If you notice any signs that concern you, consult a specialist workshop first.
We also recommend these articles:
- Volkswagen Abnormal Noise Diagnostic Guide | Causes, Repair Costs, and Urgency
- Summary of causes of poor running performance | Check points when your car won’t move forward, is unstable, or vibrates
- A comprehensive guide to VW suspension problems, repairs, and maintenance | Basics of bushings, suspension, bearings, and alignment, and symptom-specific checks
▼List of individual articles on DSG repair and maintenance▼
You can scroll
Details of defects by vehicle type
Even if the “way” of the malfunction is similar, “which model has the most common problems” differs slightly depending on the model.
The following page summarizes the trends by model and common malfunction cases among other owners.

コメント